Leveraging PIM with GDAP
In my previous blog post, I talked about the major considerations when adding roles for GDAP relationships. In some instances, you may want to bump up security a step further and pair GDAP with PIM or privileged identity management. This would allow you to have just in time access to customer workloads for users in your organization vs perpetual access. In this article, I would be showing you how to set that up for security groups within your Azure AD environment.
Prerequisites
An Active Azure AD P2 subscription
I’ve mentioned this before, but PIM comes with Azure AD P2 licensing which is being offered for free for a year for indirect resellers. This is a great time to test out PIM within your organization to help promote a model of least privilege access.
Steps:
Set up a security group with Azure AD Role Assignment
Enable Privileged Access on the Group
Add Eligible Assignments
Add Security Groups to GDAP Workloads
Test user activating membership
Set up a security group with Azure AD Role assignment
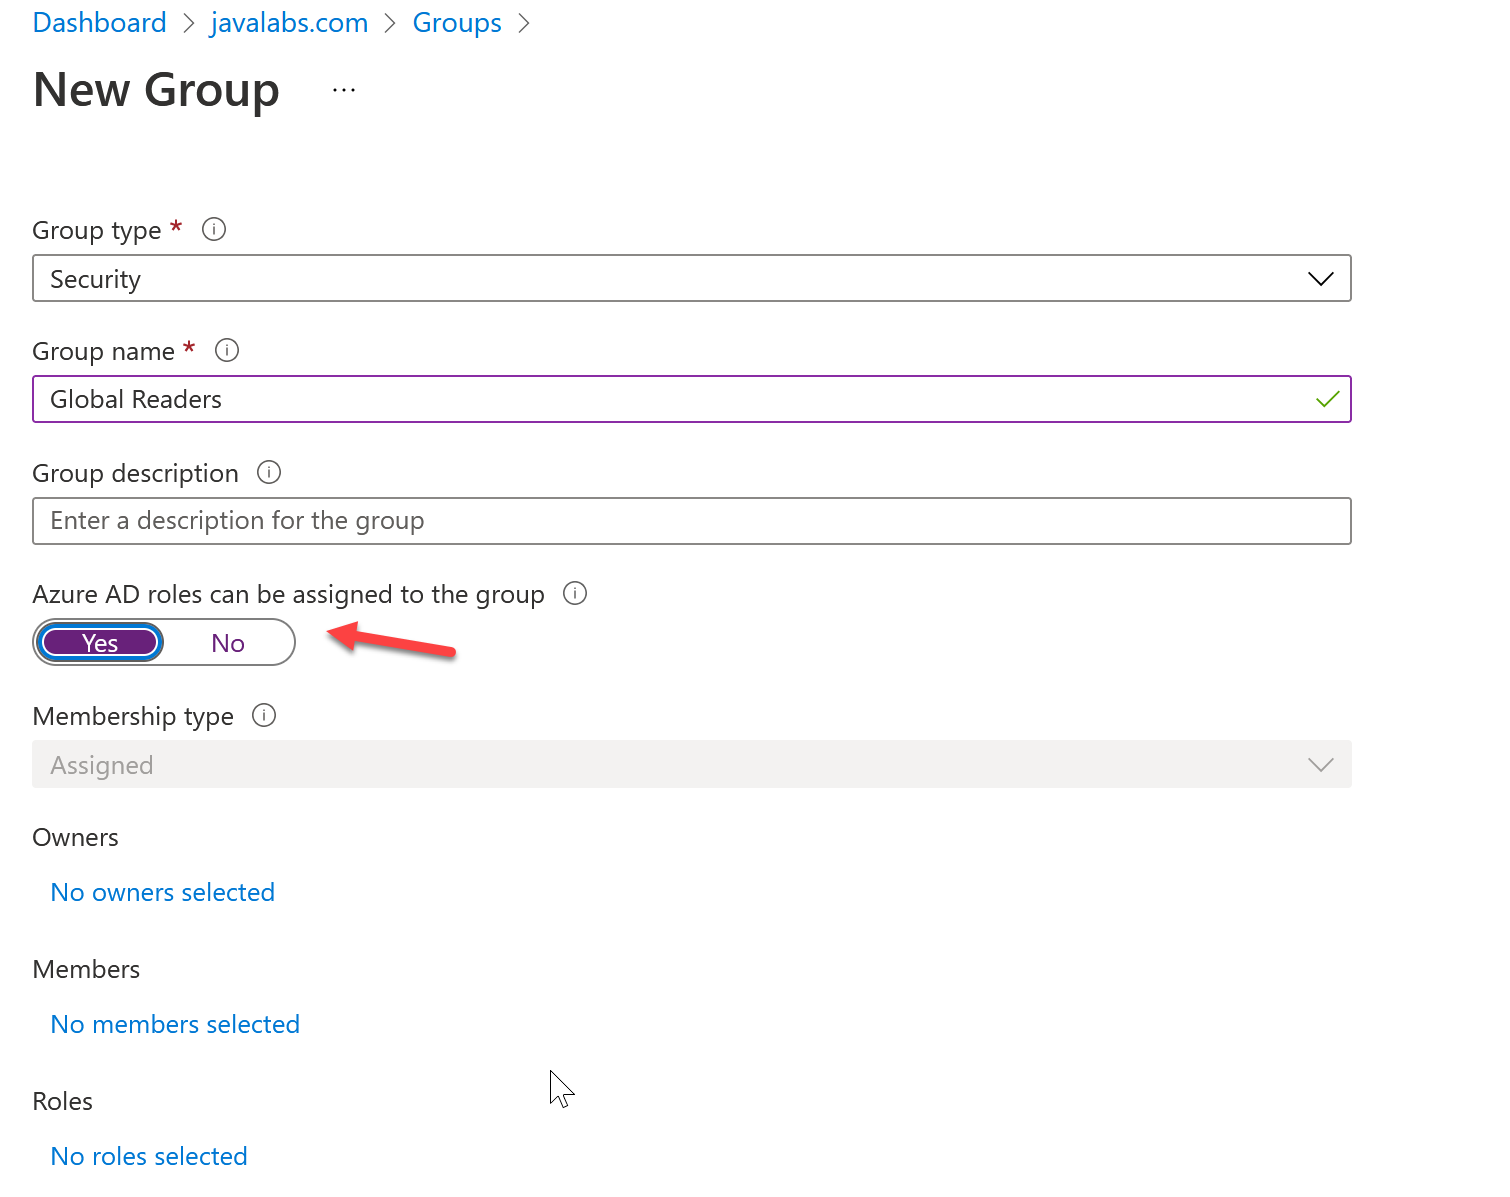
The first thing we need to do is establish a security group with Azure AD Role assignments. This type of group then becomes eligible to be used with PIM to add “eligible” members.
Create a new security group and toggle Azure AD Roles to Yes. The group does not need to be assigned any owners, members, or roles to be created. Its possible/likely you will leave these blank and yes perform the next step of adding eligible members.
Enable Privileged Access on the Group
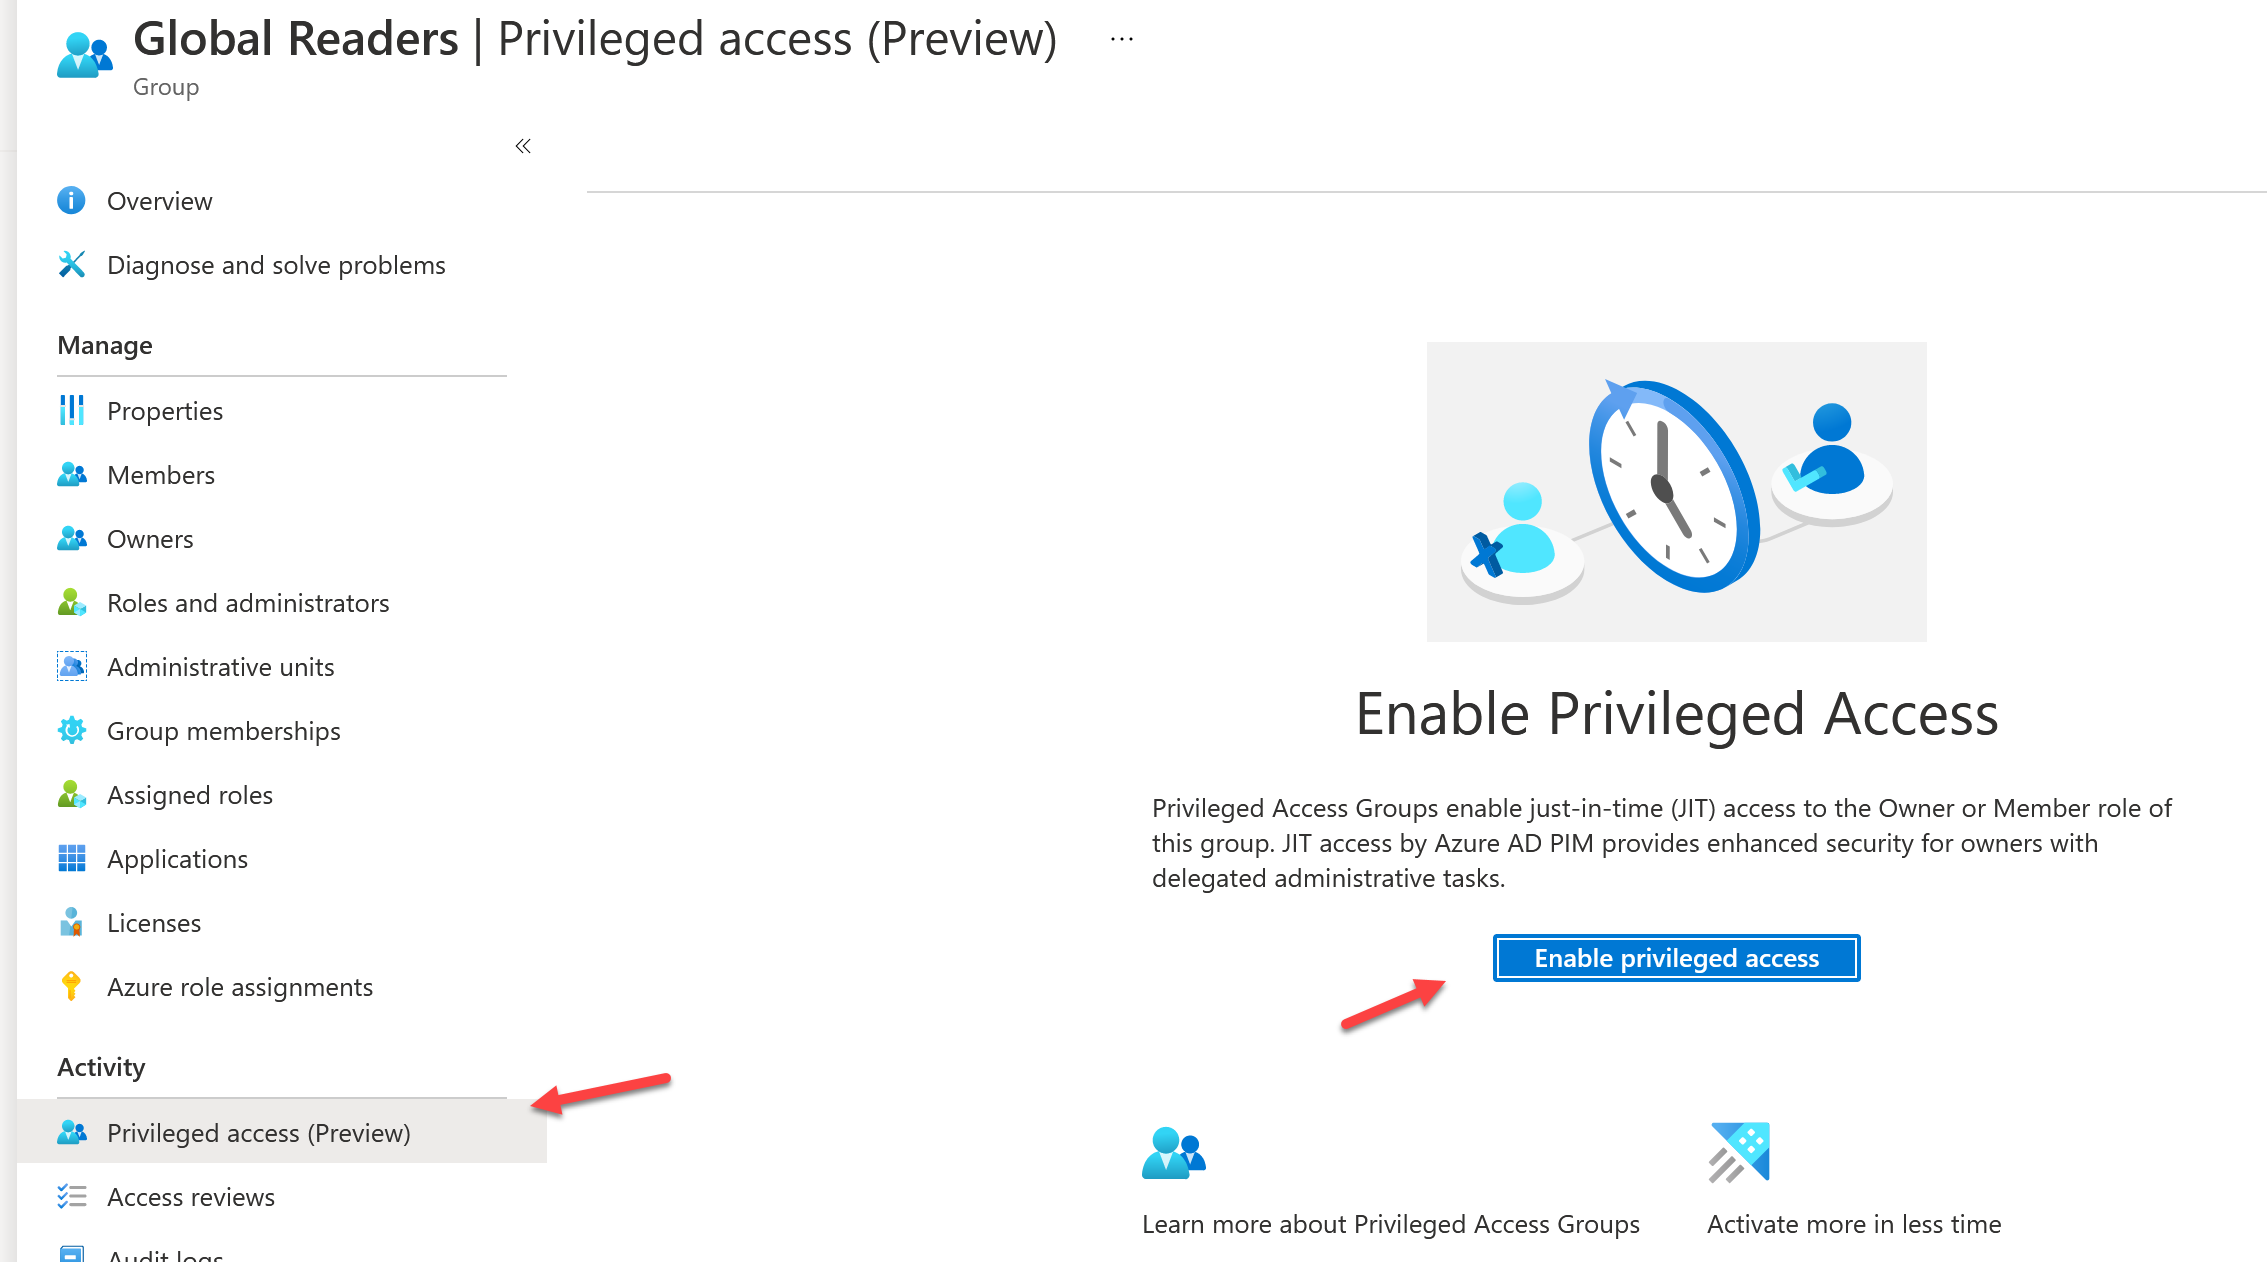
Next we will enable privileged access on the group. Click into the group from the group blade. Select Privileged Access and click Enabled Privileged Access
Add Eligible Assignments
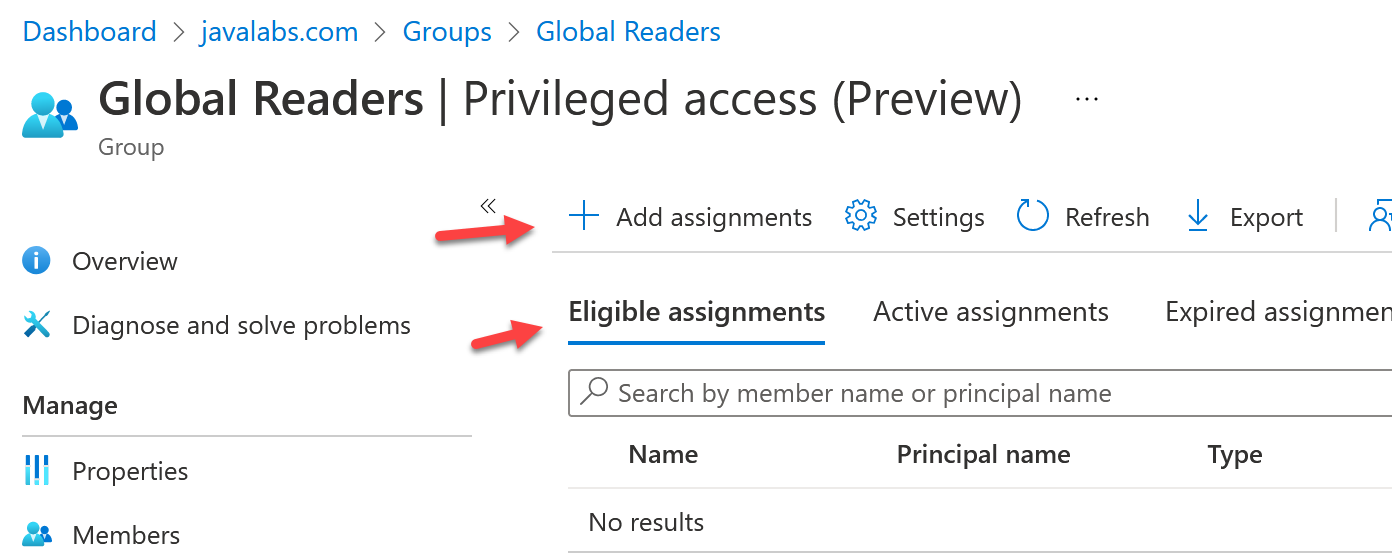
After you click on Enabled Privileged Access, you get the chance to add permanent(Active) or eligible assignments. Eligible means that users can activate this membership for a specified period of time. Click the Eligible tab and click Add Assignments.
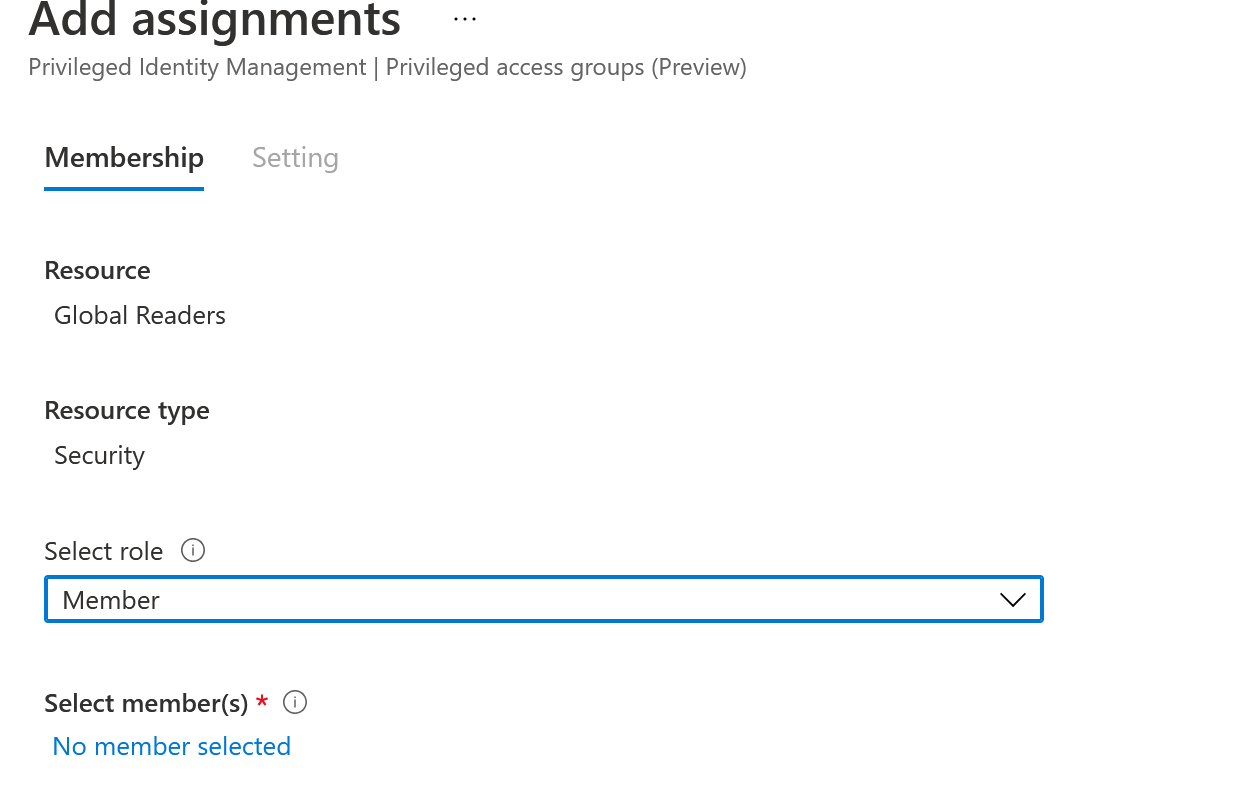
From the dropdown, select member and then add the applicable members to the group that could become eligible. These would be members in your Partner Center access those specific workloads for a customer (Global Reader, Exchange, SharePoint, etc.)
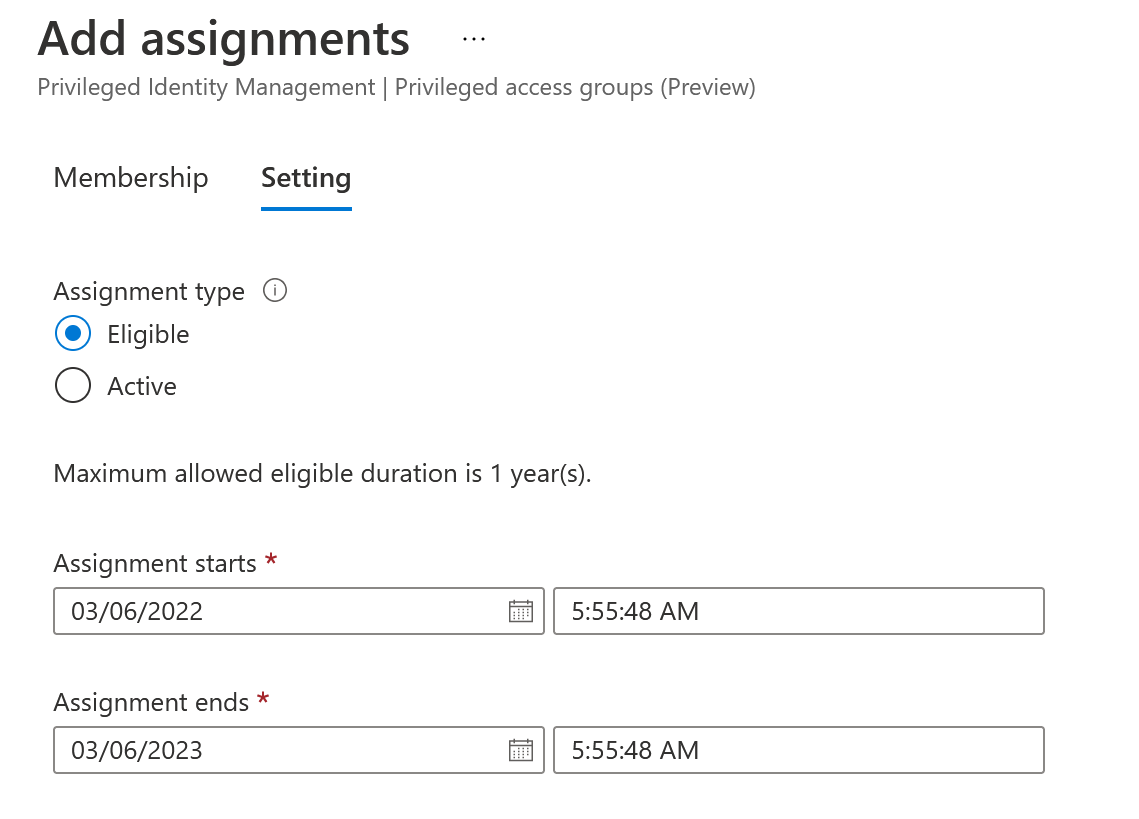
After you select the members, you will be able to select the duration of eligibility. The max value is one year and you can set this to be less time
Add Security Groups to GDAP Workloads
Now that we have our security group created, we need to assign the group to a workload established from a GDAP relationship. This step assumes you have already created that relationship. If you are not familiar with how to establish relationships, check out my previous article.
In Partner Center, select Customers>Administer>Select Single customer
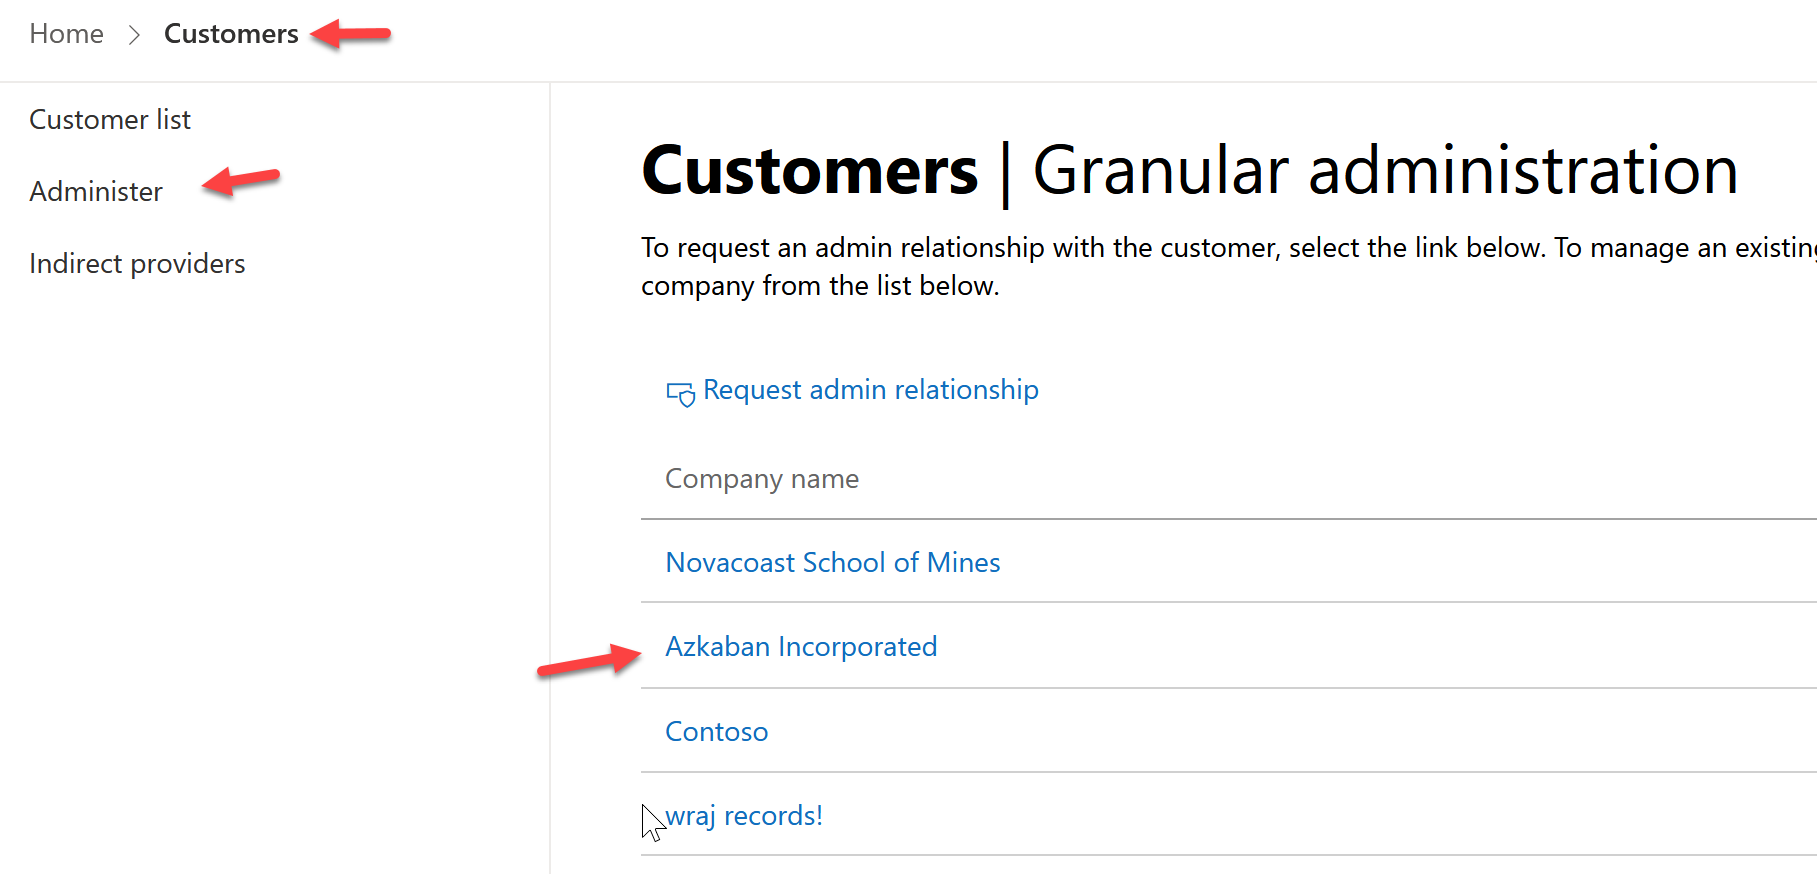
Select One of your existing GDAP relationships

Click Add Security Groups. Select your recently created security group and click next.
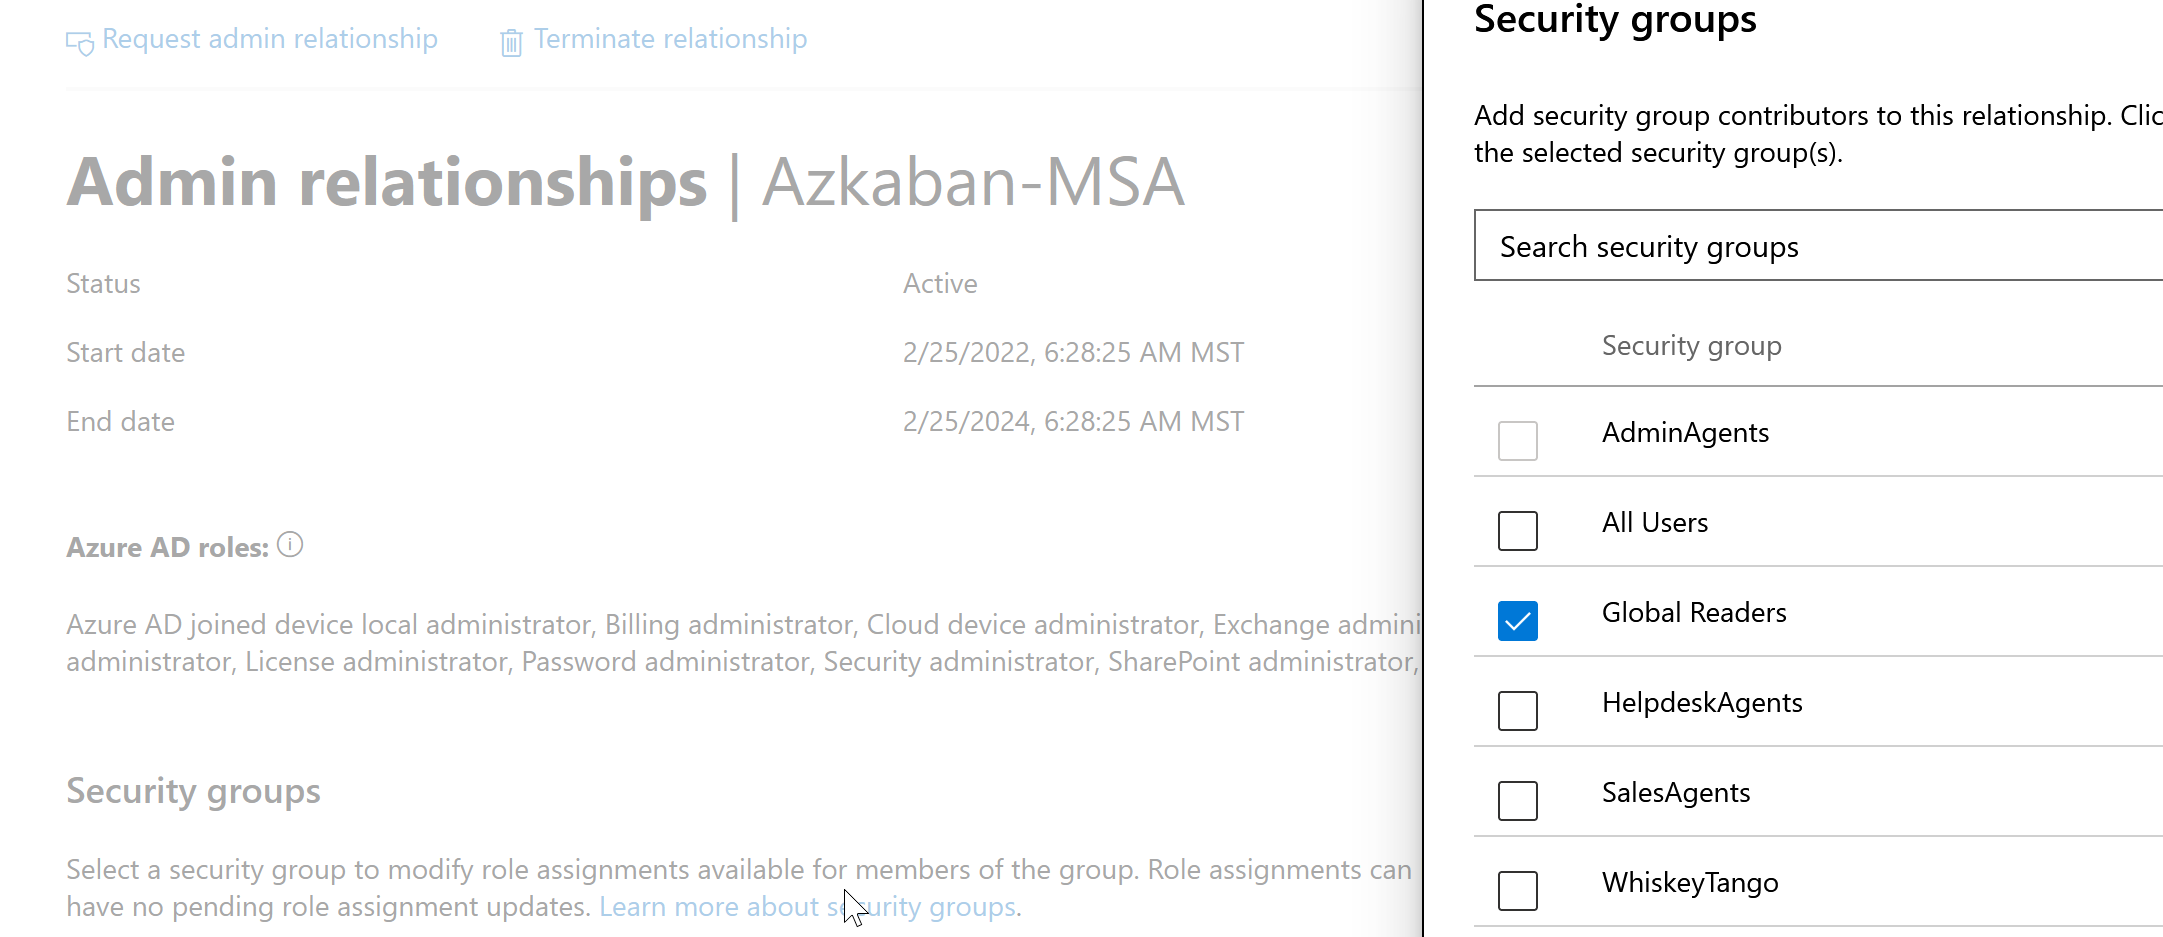
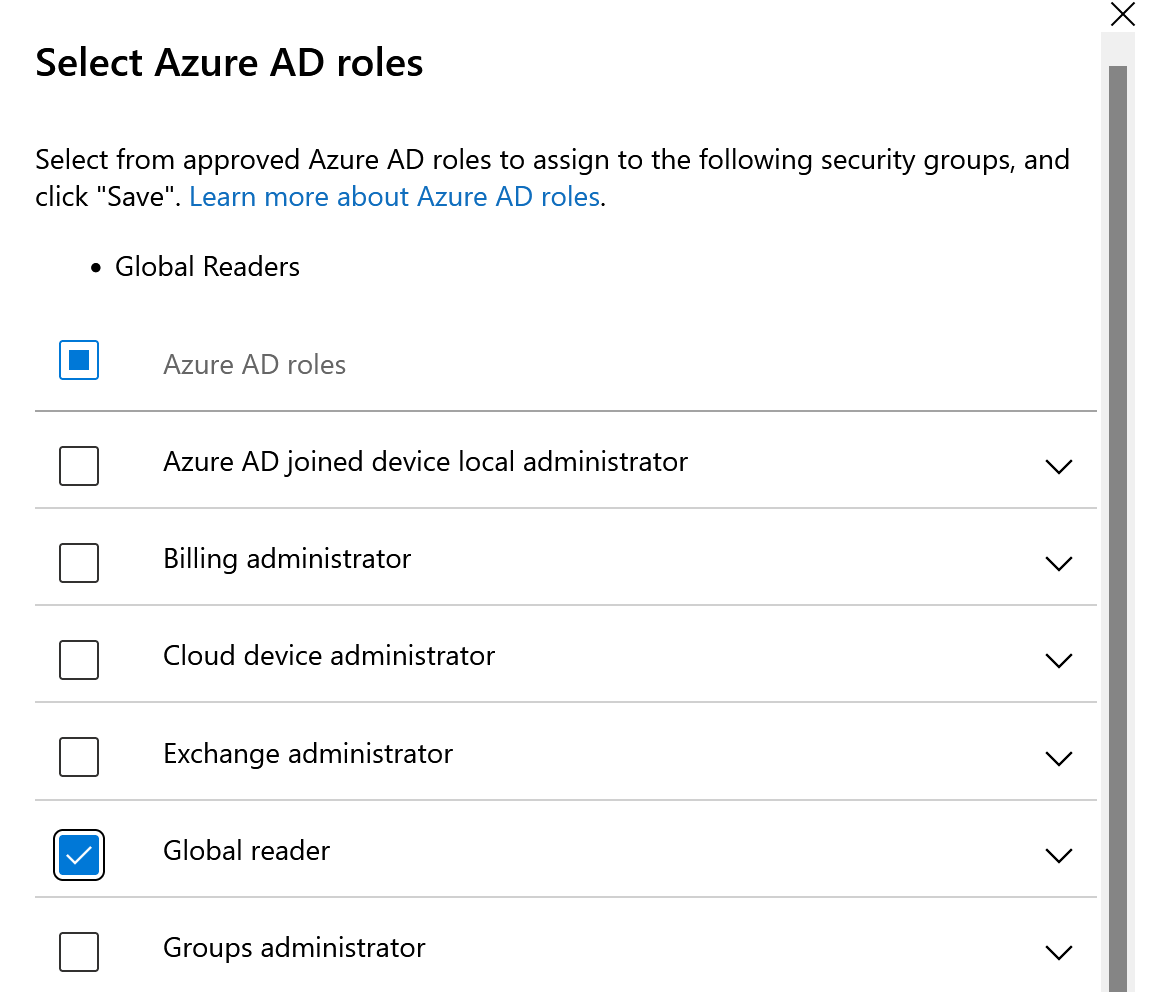
Select the appropriate roles based on the workload you want the security group to have access to. In this example, I made the security group Global Readers, so I am going to grant that role. After you save, the status will go from pending to Active after about 30 seconds (may require page refresh)
Test user activating membership
Now that we have our PIM Group established and assigned to a workload, we can now test a user activating their temporary membership.
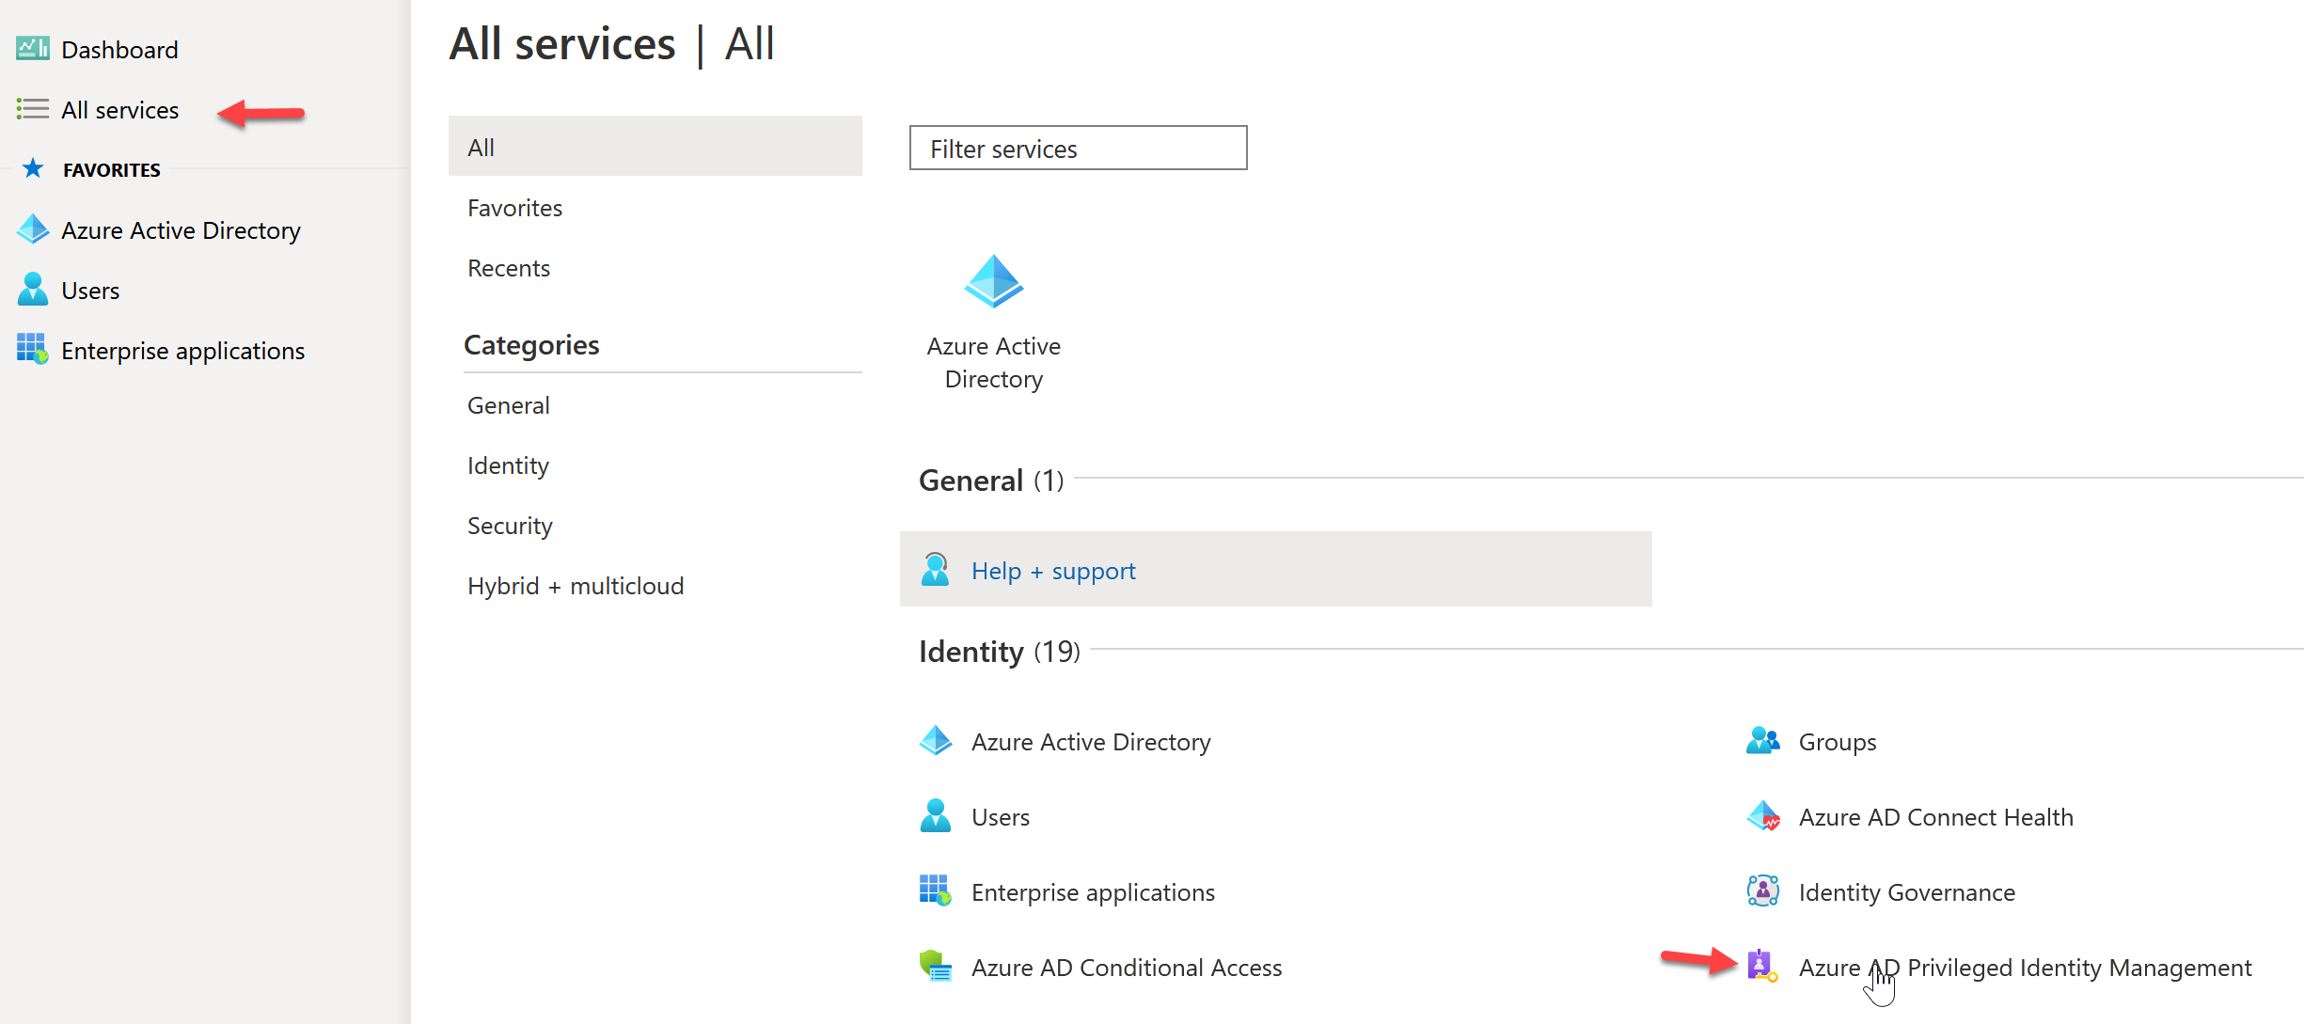
Sign in to aad.portal.azure.com with a user you added as an eligible member. From the left nav, select All Services and Search or select Azure AD Privileged Identity Management
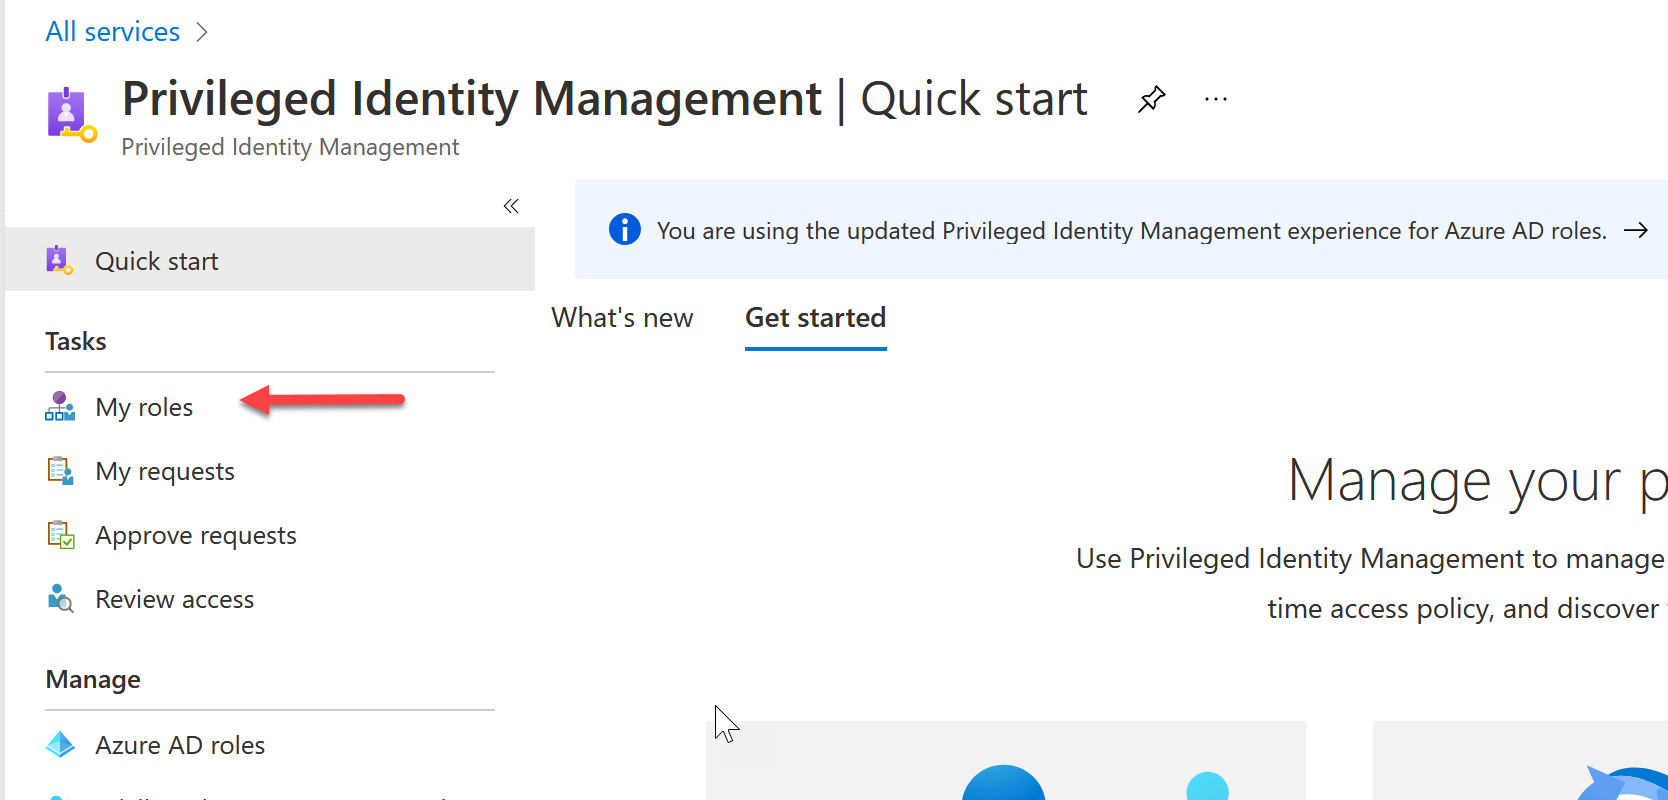
From the main page, select My Roles
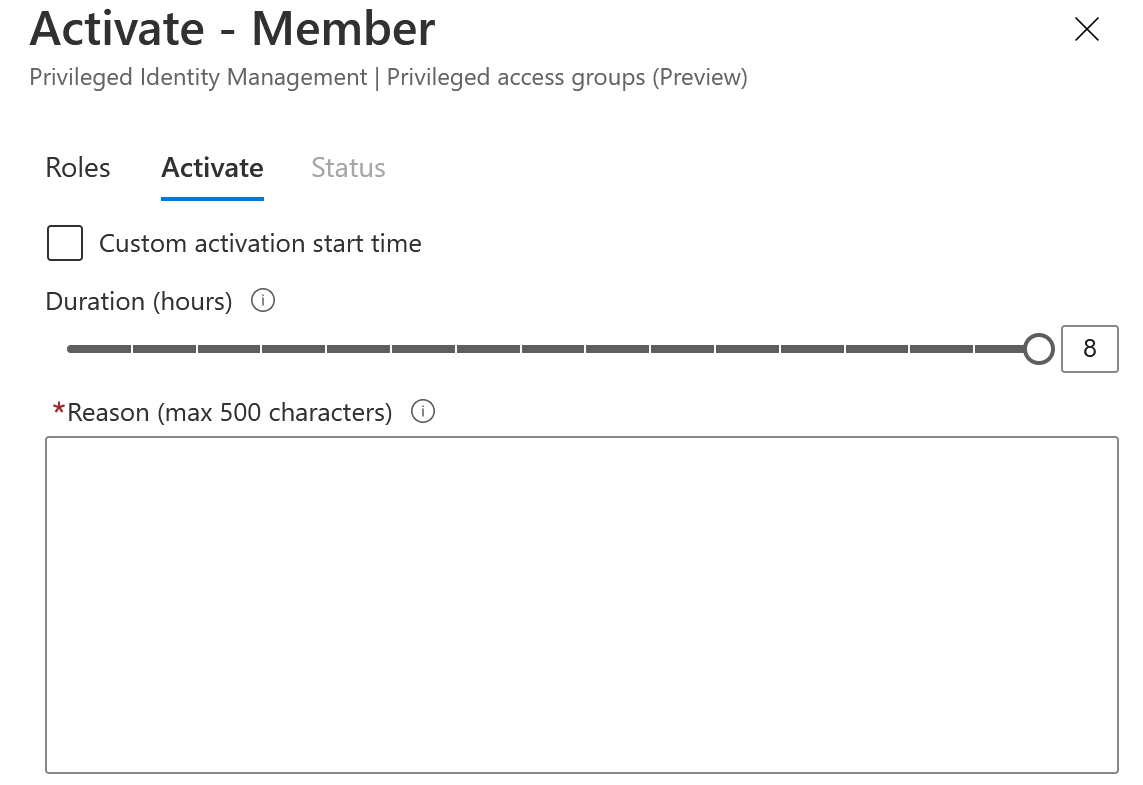
Select Privileged Access Groups and click Activate to activate the membership

Add the number of hours you will need membership and add a reason for activation. This is great to have as an audit trail for compliance.
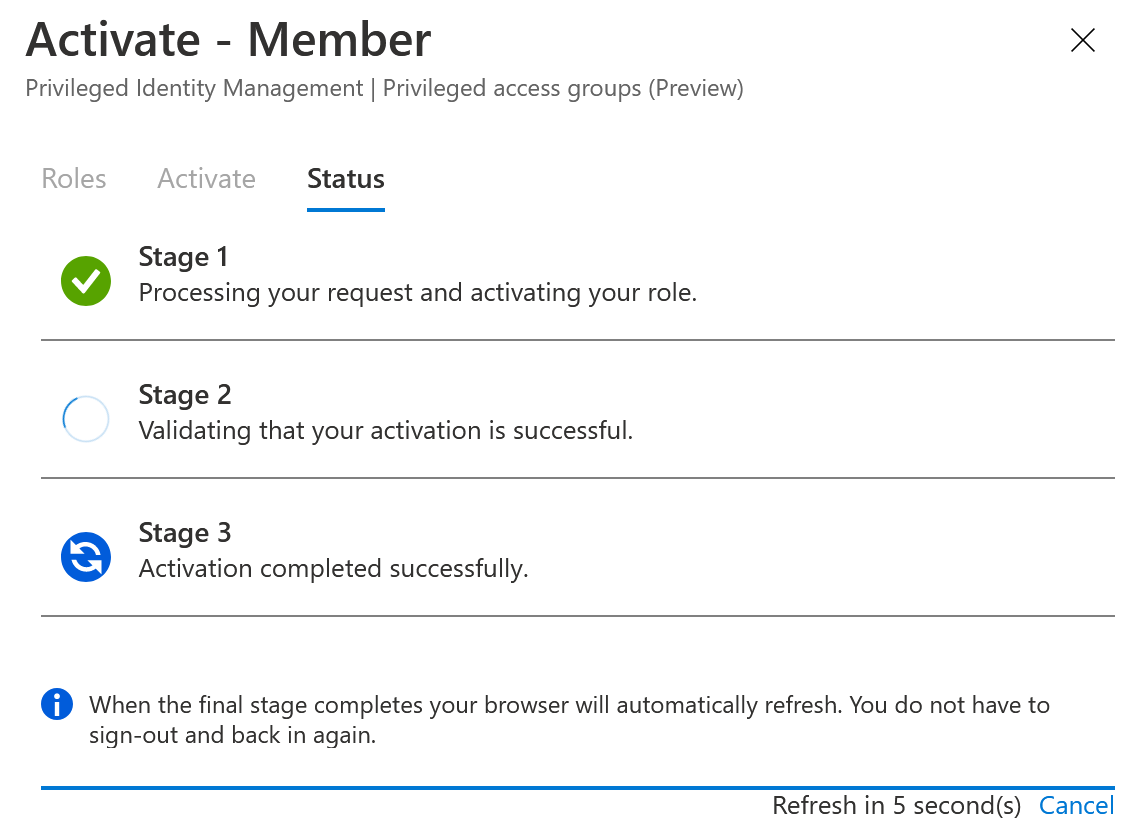
Once you activate, Azure AD will automatically walk through steps to activate the membership and refresh your session
You will see on the Active Assignments tab that the membership is active. This also includes the end time and ability to deactivate.

Since that the membership is active, you can test your access via Partner Center. Go to Customers>Administer>Expand the Customer you added the Security group to
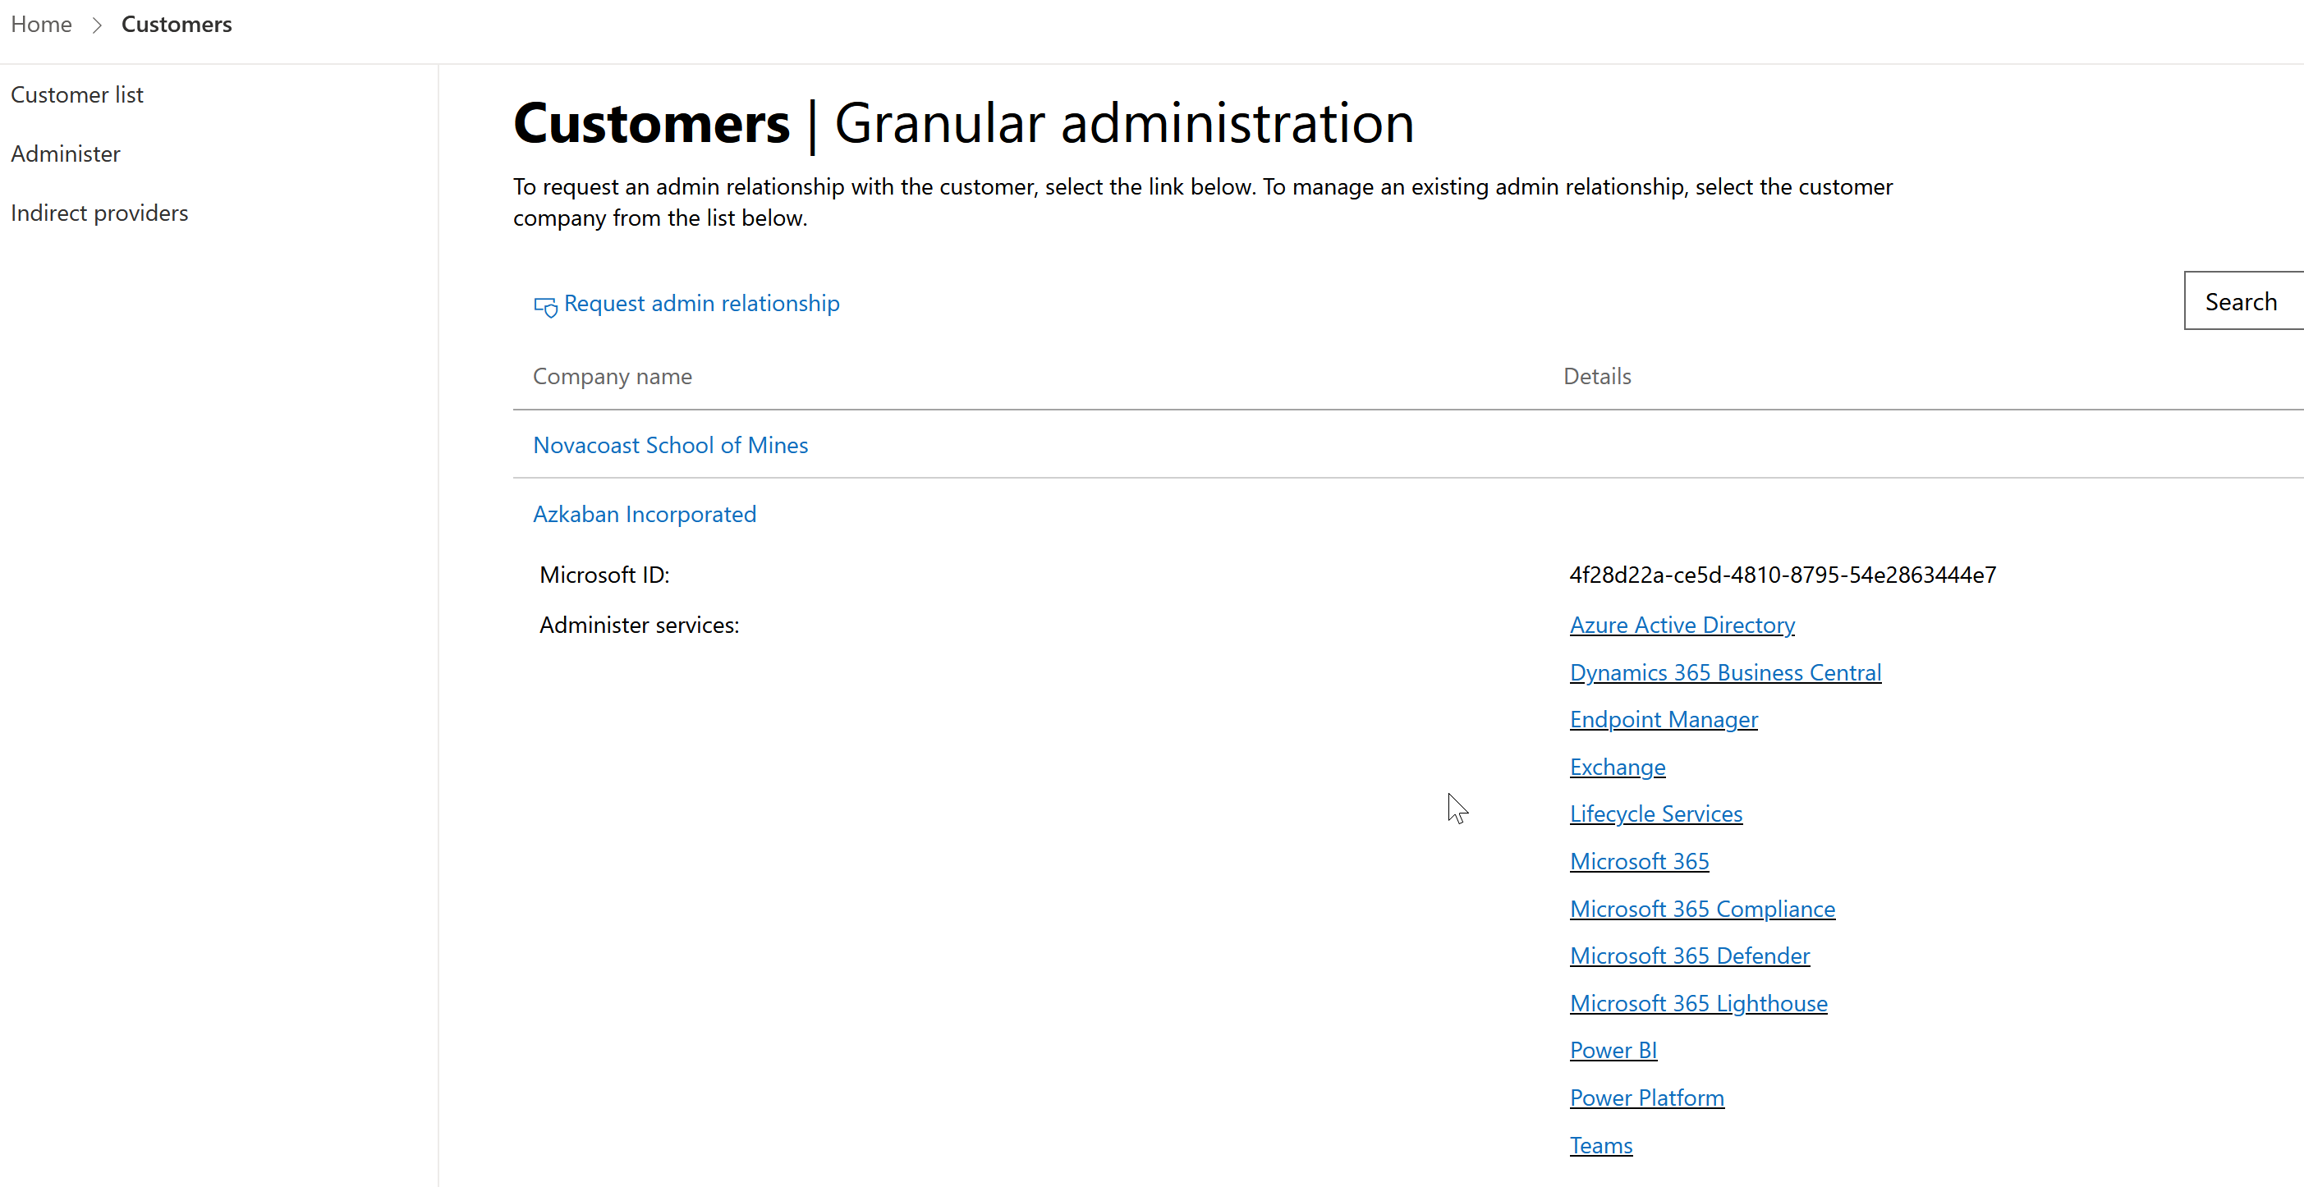
The workloads you see here should be reflective of what roles you gave to the security group in the previous section. In this example we gave Global Reader rights. This means we could test going into the M365 Admin Center>Clicking into Users and then being able to view users but not create them. If you did something more specific, like assigning the Exchange Admin role to the security group, the only workload you should be seeing is exchange.
Bonus: More Granular Settings for the Group Membership
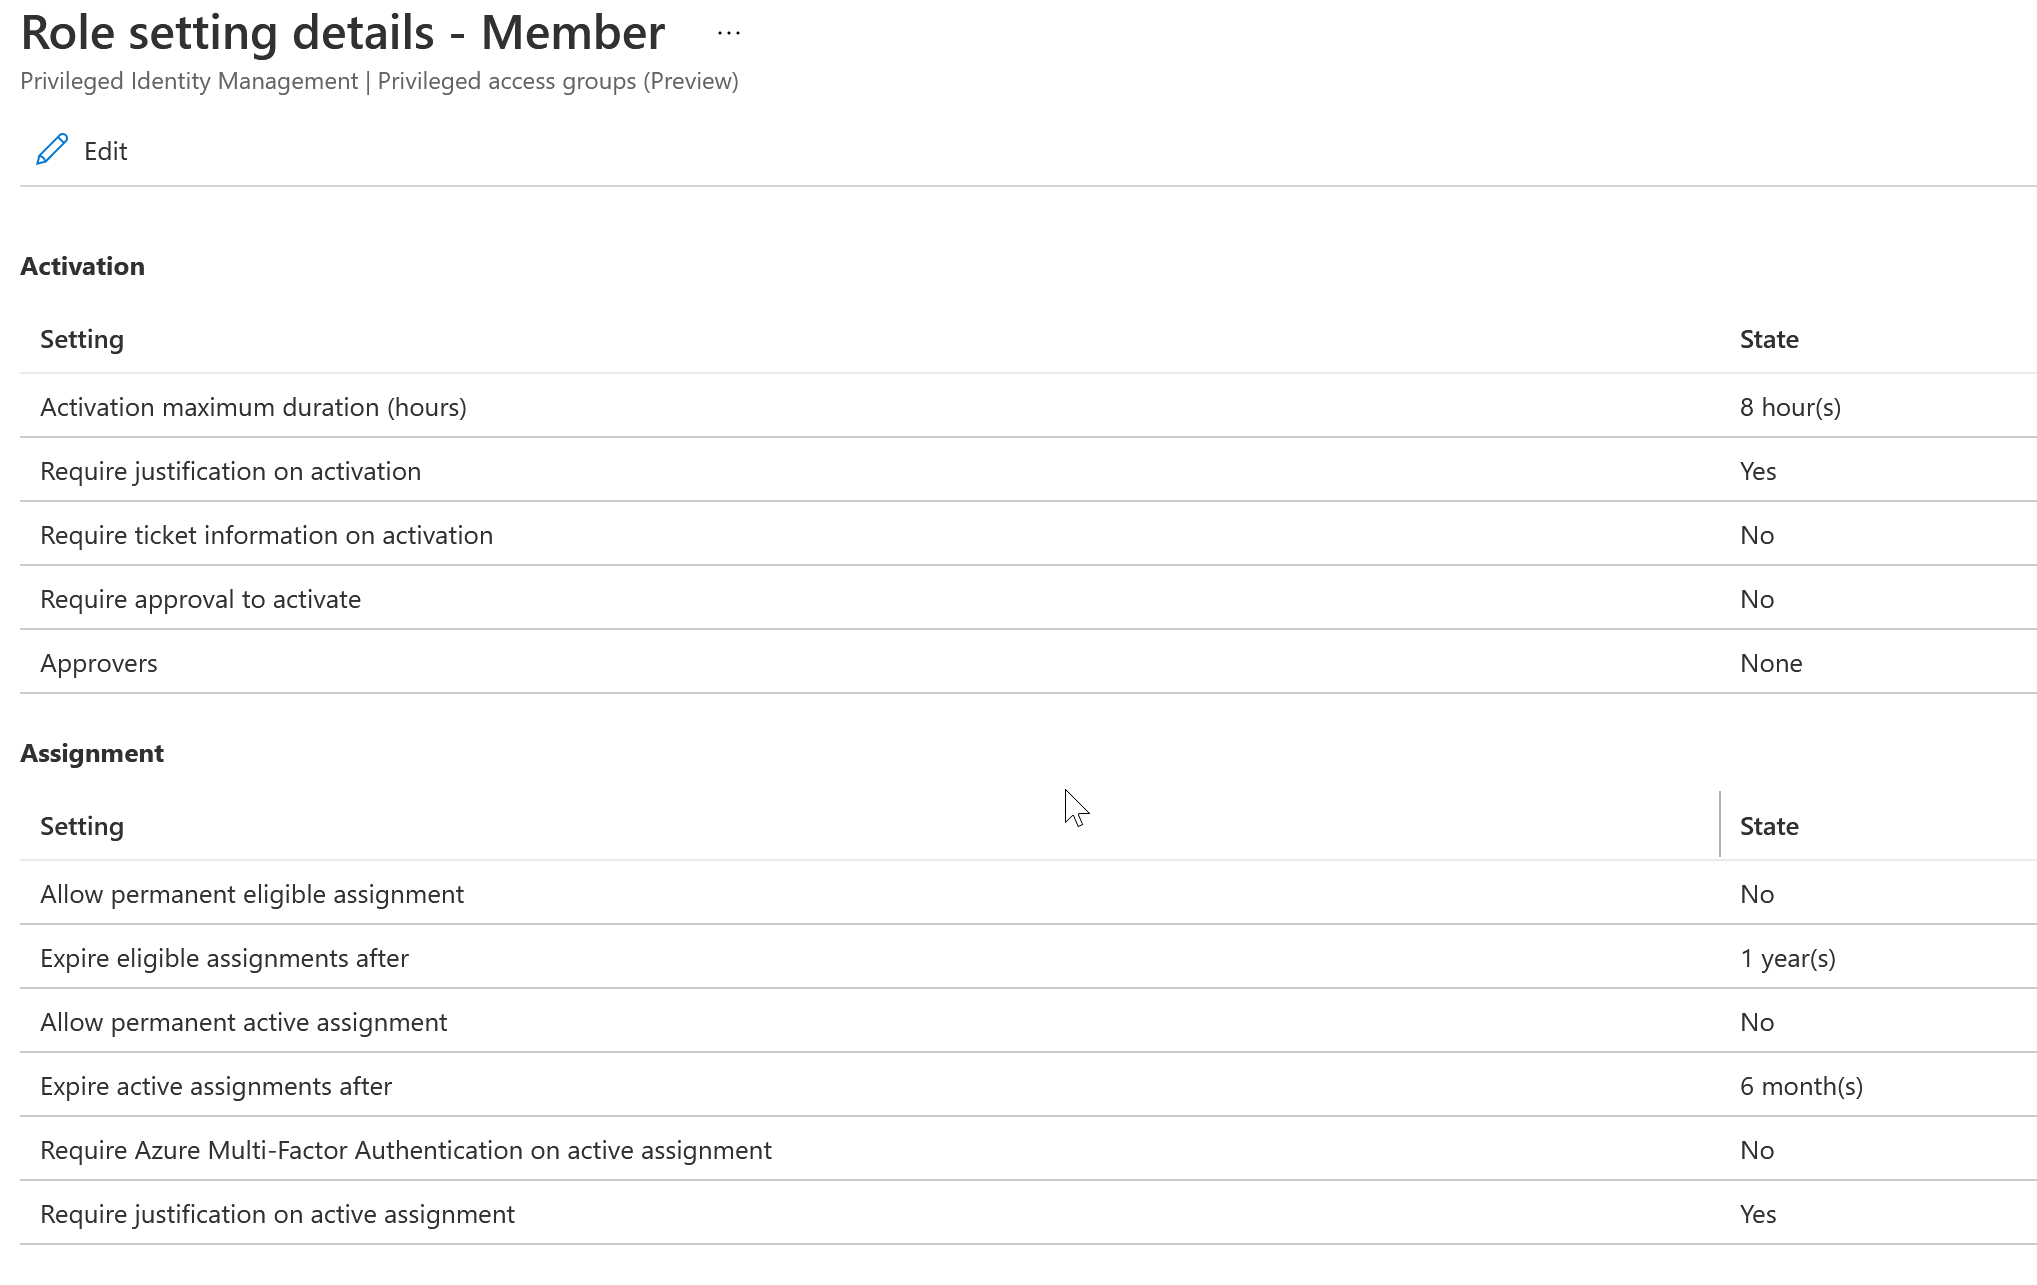
We covered the basics above when it comes to creating eligible memberships with groups and PIM. What if you wanted to require approval to activate the membership? What if you wanted to define the maximum duration someone could be eligible vs the 8hr default? What if you wanted to prompt the user for MFA when they try to activate membership? This is all possible from the management section of PIM.
In the Azure AD Portal, go back to Azure AD Privileged identity Management from All Services. Select Privileged access groups and select the security group you made in the previous sections.
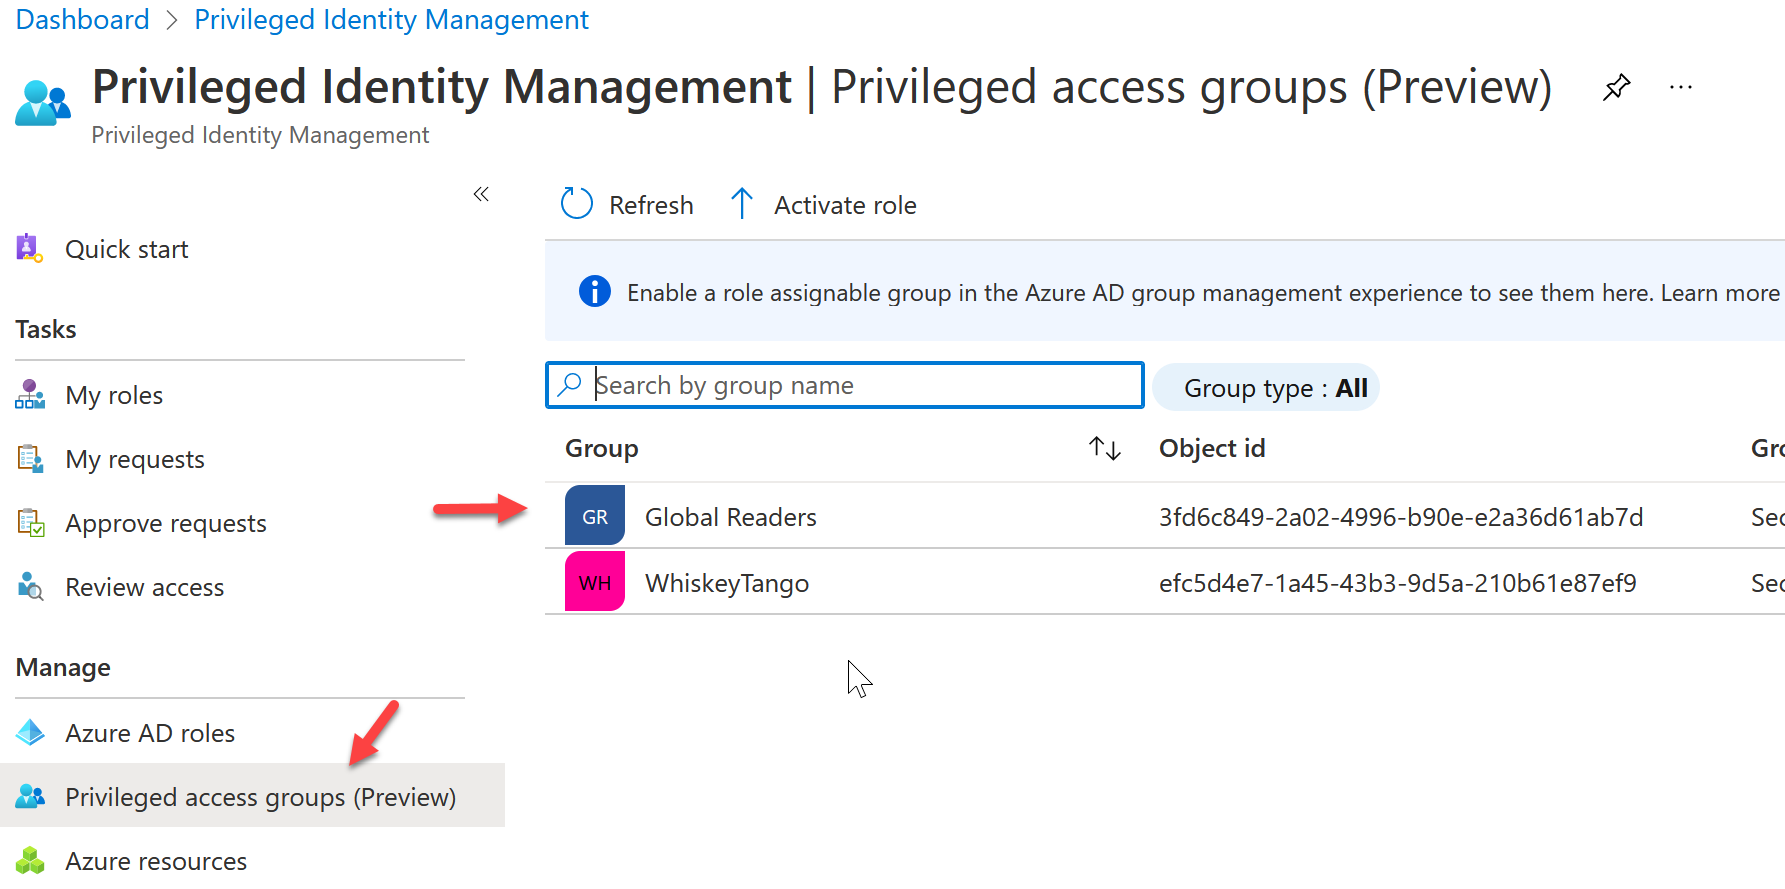
Under Manage, select Settings.
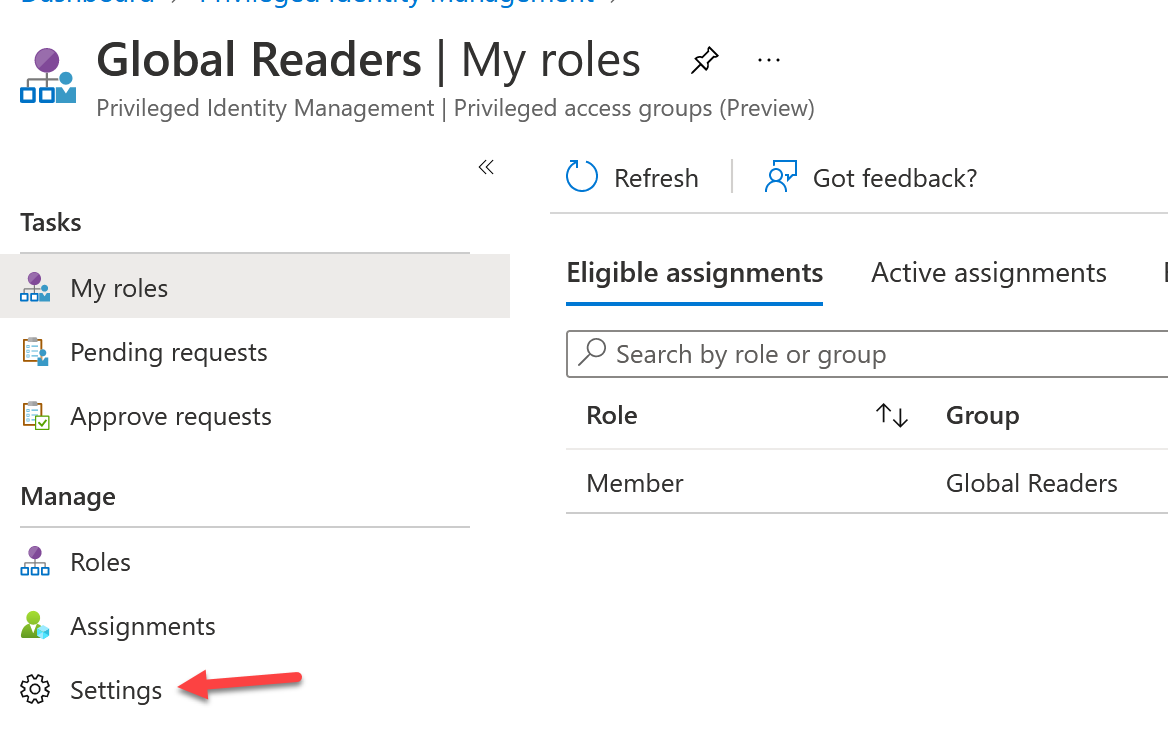
Click Member. From here you will be able to select all of the granular settings when it comes to this eligible membership.
Final Thoughts
I hope that this article provided more targeted guidance on setting up PIM security groups that get assigned to GDAP workloads. I believe that PIM should be put into place for higher levels of permissions into customer environments like the Global Reader role that I showed in the example here. You want your techs to access customer environments securely but you also don’t want to lock things down so much that it becomes a huge pain to perform any investigation or administration. For this reason, you may add techs that constantly access these portals to a perpetual security group and then add techs that do not often need access to the eligible membership assignment.
Last updated